Installation and upgrades
Kubernetes
Installation using Helm
EDB Postgres Distributed for Kubernetes can be installed using the provided Helm chart.
If you don't have Helm installed yet, please follow the instructions to install it in your system.
Assuming you have Helm installed, the first step is to add the repository:
helm repo add edb https://enterprisedb.github.io/edb-postgres-for-kubernetes-charts/You will need credentials to enable helm to retrieve the various
operator and operand images that are stored in private repositories.
Make sure to replace your username and password
in the command below:
helm upgrade --dependency-update \
  --install edb-pg4k-pgd \
  --namespace pgd-operator-system \
  --create-namespace \
  edb/edb-postgres-distributed-for-kubernetes \
  --set image.imageCredentials.username=${REPO} \
  --set image.imageCredentials.password=${TOKEN}
Set REPO to either k8s_enterprise_pgd or k8s_standard_pgd depending on the EDB software subscription purchased and Postgres distribution to be installed. Use k8s_enterprise_pgd if you are a trialist or preview user.
Set TOKEN to the repository token for your EDB account. You can obtain this by going to the Repos page on the EDB website, signing in (if necessary) and then and displaying the EDB Repos 2.0 token using the Reveal Token button or copying it using the Copy button.
For further details on the Helm chart, please refer to the Helm chart repo.
Red Hat OpenShift
Installation via web console
The EDB Postgres Distributed for Kubernetes operator can be found in the Red Hat OperatorHub directly from your OpenShift dashboard.
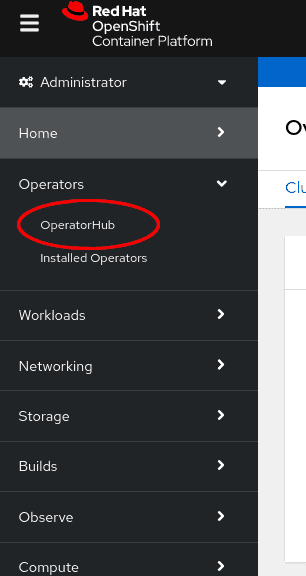
Navigate in the web console to the
Operators -> OperatorHubpage:
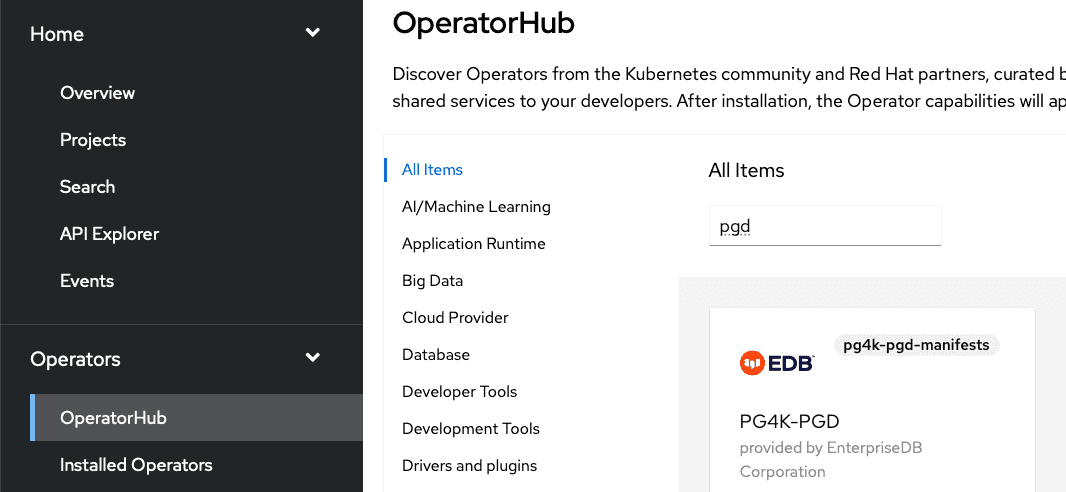
Use the search box to restrict the listing, e.g. using
EDBorpgd:
Read the information about the Operator and select
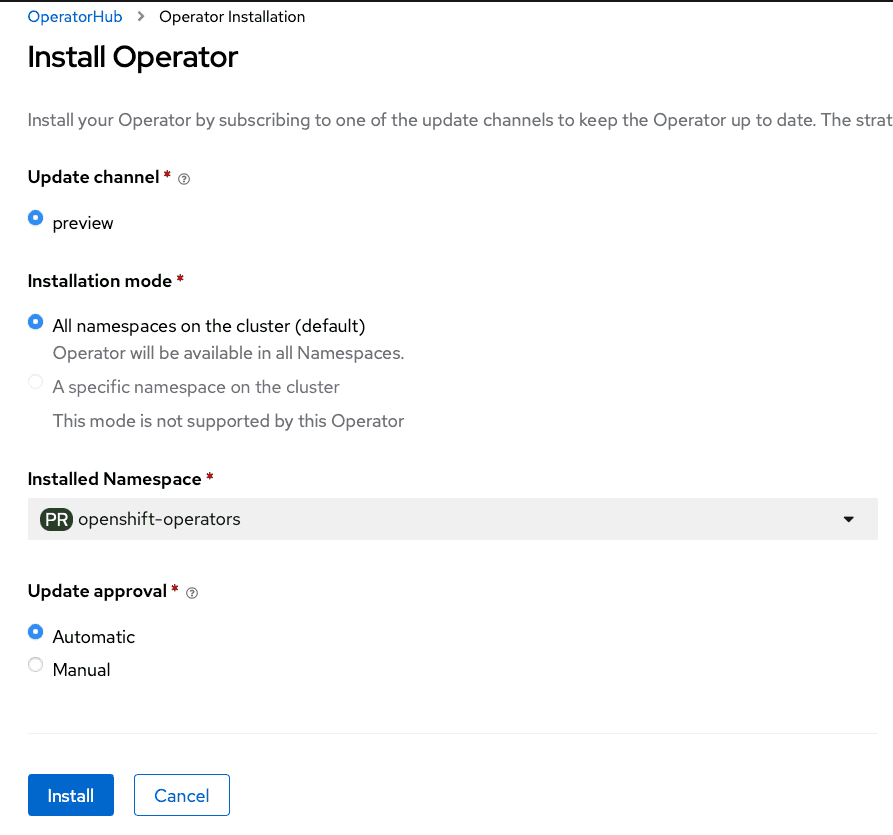
Install.The following
Operator installationpage expects you to choose:- the installation mode: cluster-wide is the only mode at the moment.
- the update channel (at the moment
alpha) - the approval strategy, following the availability on the market place of
a new release of the operator, certified by Red Hat:
Automatic: OLM automatically upgrades the running operator with the new versionManual: OpenShift waits for human intervention, by requiring an approval in theInstalled Operatorssection
Cluster-wide installation
With cluster-wide installation, you are asking OpenShift to install the
Operator in the default openshift-operators namespace and to make it
available to all the projects in the cluster. This is the default and normally
recommended approach to install EDB Postgres Distributed for Kubernetes.
From the web console, select All namespaces on the cluster (default) as
Installation mode:

As a result, the operator will be visible in every namespace. Otherwise, as with any
other OpenShift operator, check the logs in any pods in the openshift-operators
project on the Workloads → Pods page that are reporting issues to troubleshoot further.
Beware
By choosing the cluster-wide installation you cannot easily move to a single project installation at a later time.
Creating a PGD cluster
After the installation from OpenShift, you should find the operator deployment
in the openshift-operators namespace. Notice the cert-manager operator will
also get installed.
$ oc get deployments -n openshift-operators
NAME                                            READY   UP-TO-DATE   AVAILABLE   AGE
cert-manager-operator                           1/1     1            1           11m
pgd-operator-controller-manager                 1/1     1            1           11m
postgresql-operator-controller-manager-1-20-0   1/1     1            1           23h
…
Checking that the pgd-operator-controller-manager deployment is READY, we can
start creating PGD clusters. See Examples of configuration for sample files.
Remember to deploy your PGD clusters on a dedicated namespace. The default namespace is reserved.
First then, you should create a new namespace, and deploy a self-signed
certificate Issuer in it:
oc create ns my-namespace
oc apply -f hack/samples/issuer-selfsigned.yaml -n my-namespace
Now you can deploy a PGD cluster, for example a flexible 3-region, which contains two data groups and a witness group:
oc apply -f docs/src/samples/flexible_3regions.yaml -n my-namespace
You should start seeing your PGD groups come up:
$ oc get pgdgroups -n my-namespace
NAME       DATA INSTANCES   WITNESS INSTANCES   PHASE                PHASE DETAILS   AGE
region-a   2                1                   PGDGroup - Healthy                   23m
region-b   2                1                   PGDGroup - Healthy                   23m
region-c   0                1                   PGDGroup - Healthy                   23m
- On this page
- Kubernetes
- Red Hat OpenShift